Experimenter Kit
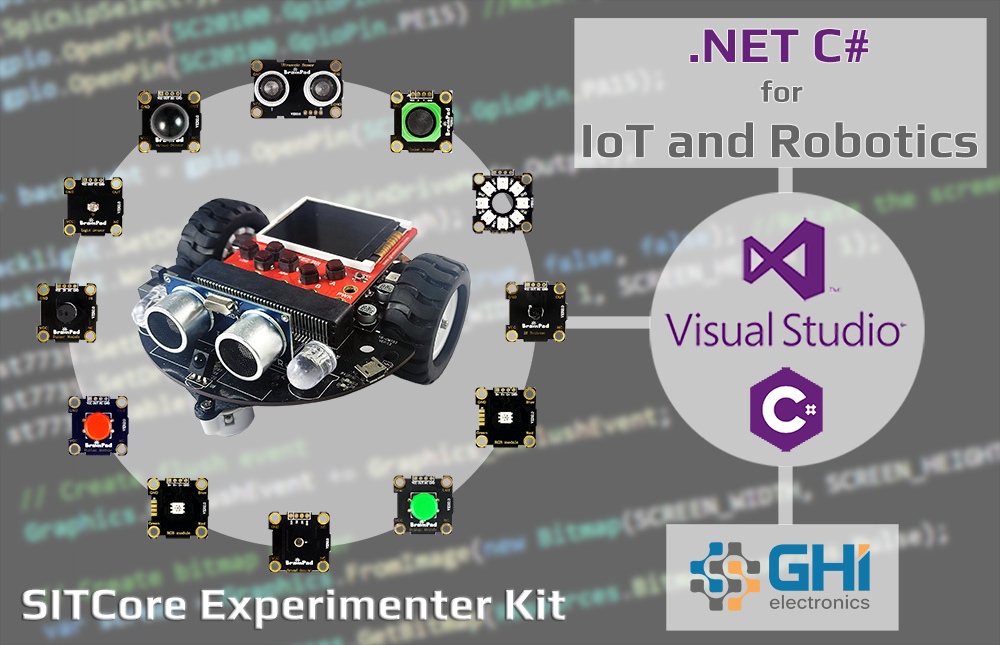
Before you start, for those with no hardware experience, we recommend starting out with our SITCore Experimenter Kit.
Those with some hardware experience can still take advantage of the Experimenter Kit, but also have the options to start with one of the SBCs.
SITCore & TinyCLR OS, the perfect combo!
SITCore hardware with its secure TinyCLR software is a perfect combination that has allowed companies to develop secure IoT and embedded products in record time. Developers code and debug using .NET C# from within Microsoft Visual Studio.
This pages serves as the starting point for prepping the SITCore device with the proper TinyCLR firmware and then setting up the development machine for TinyCLR OS.
Firmware Update
The first step is in loading the SITCore board with appropriate TinyCLR OS firmware. We recommend using the latest production firmware. The production ready firmware is marked RTW (Ready to Wear). You need to download that firmware and also the TinyCLR Config tool from the download page on the docs website. Note that some boards, like FEZ Feather for example, will need the SC20xxx firmware, where other boards, like FEZ Flea for example, will need the SC13xxx firmware. Check your board’s docs to determine what chipset is being used.
Install and run TinyCLR Config and plug the SITCore board to your PC. The PC will automatically load the appropriate drivers. Now open TinyCLR Config and the Port drop-down menu will show the detected SITCore device. The device will either be COMxx (GHI Electronics) if the device has no firmware, or the SITCore chipset part number. For example, FEZ Duino will show SC20100 but FEZ Portal will show SC20260.
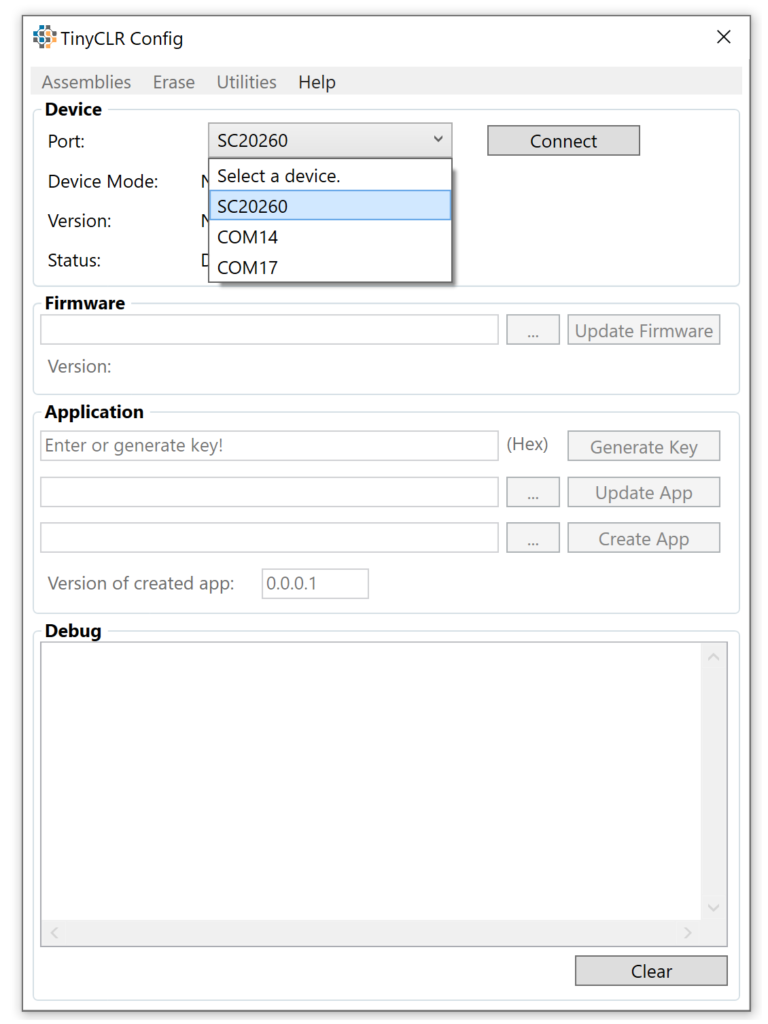
Select the appropriate port and click connect. We now can select the firmware file (downloaded earlier) and click “Update Firmware”.
Visual Studio Setup
If you do not have it yet, download and install Visual Studio 2022. Note that Visual Studio Code will not work; however, you can use the free Visual Studio Community Edition. Also, the Visual Studio setup must include the .NET Desktop Development option. This is what pulls in the C# tools.
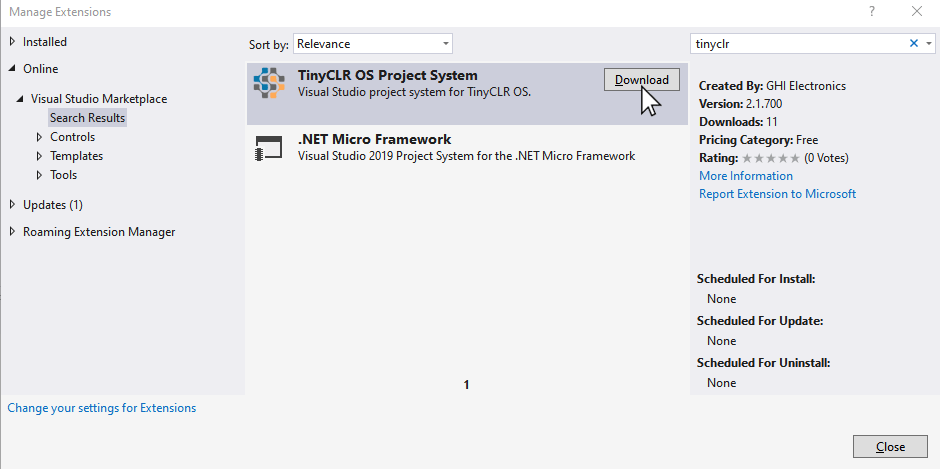
Open Visual Studio and from the top menu select Extensions -> Manage Extensions and search for TinyCLR under the Online > Visual Studio Marketplace. Download and install TinyCLR OS Project.
Blinky!
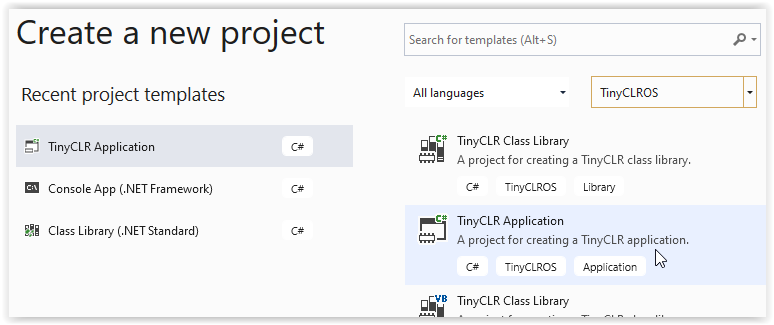
If you are new to hardware, blinking an LED is the “Hello World” of circuits. We will begin by starting Visual Studio and creating a new project, like you would with any other C# project. The only exception is now we would need find the TinyCLR template and start a TinyCLR Application.
You can code now just like you would a desktop C# application. Additionally, TinyCLR OS brings new NuGet libraries for hardware access. For blinking an LED, we need the GPIO (General Purpose Input Output) library. Go to Manage NuGet Packages… and search for “tinyclr gpio”. Install the GHIElectronics.TinyCLR.Devices.Gpio library.
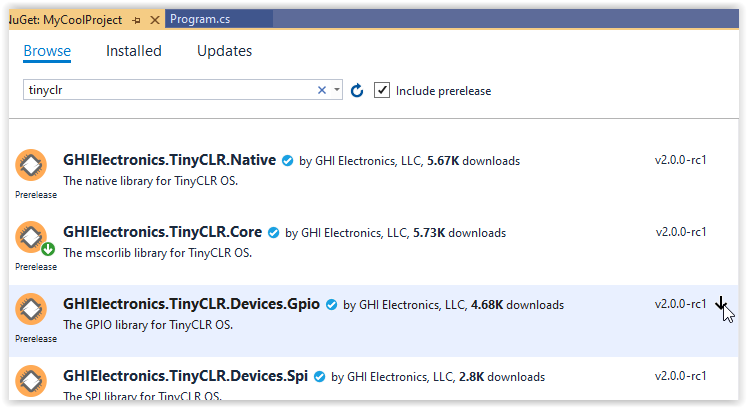
Do the same for GHIElectronics.TinyCLR.Pins library and now you are ready to blink! The code is very simple, but the gpio tutorial also explains how it all works. Note that a lot of boards will have an LED on pin PA8, but that is not always the case. Check what pin is connected to an LED on your board. It is usually printed next to the LED, or it is found in the documentations.
Tip: The SBC family of boards include pin mapping for all on-board peripherals, including the LED. For example, FEZDuino.GpioPin.Led
using System;
using System.Collections;
using System.Diagnostics;
using System.Text;
using System.Threading;

using GHIElectronics.TinyCLR.Devices.Gpio;
using GHIElectronics.TinyCLR.Pins;

namespace Sample {
    class Program {

        static void Main() {
            var led = GpioController.GetDefault().OpenPin(SC20260.GpioPin.PA8);

            led.SetDriveMode(GpioPinDriveMode.Output);

            while(true) {

                led.Write(GpioPinValue.High);
                Thread.Sleep(100);
                led.Write(GpioPinValue.Low);
                Thread.Sleep(300);
            }
        }
    }
}
Still need help? Jump right into the community forum and let us know what you are working on.
